Minggu, 12 Desember 2021

Intermittent Fasting Beer

Intermittent Fasting Beer

How to Properly Take Probiotics with Antibiotics

Note: This is a guest post from Jamie Morea

Even the healthiest among us will likely have to take an antibiotic at some point in our lives – whether it's for strep throat, a tooth infection, or as a pre-surgery prophylactic.

The truth is that antibiotics are life-saving medicines, but they can do a number on our overall health.

From diarrhea and yeast infections to more serious inflammatory and immune conditions, antibiotics aren't without their side effects.

The good news is that if you do need antibiotics for a bacterial infection, you can take steps to support your body during the process to minimize negative health consequences, including taking probiotics with antibiotics.

What Are Antibiotics?

Antibiotics in a ContainerThe word antibiotic stems from the Greek "anti" and "bios," which translate as "against life."

Indeed, antibiotics are chemicals that either kill bacteria or prevent them from multiplying – stopping bacterial infections in their tracks or reducing them so our immune system can take over.

Sounds pretty lethal, right?

The good news is that antibiotics work by targeting certain features of bacterial cells, but they leave our human cells alone.

Some antibiotics prevent bacteria from building cell walls, and others interfere with their protein-building process.

Although most people credit the advent of antibiotics to Scottish biologist Alexander Fleming in 1928 with his discovery of penicillin, we now know that even ancient cultures used antibiotics to control bacterial infections.

Nearly 2,000 years ago, prehistoric Nubians brewed beer with Streptomyces, a tetracycline-producing soil bacteria (1).

What Is Antibiotic Resistance?

There's no doubt that antibiotics have a crucial place in modern medicine, but their use does come with some significant downsides.

The overuse and misuse of antibiotics have led to antibiotic resistance, which is when bacteria become resistant to antibiotics.

This trait can be passed on from bacteria to bacteria – even among different species! – which leads to even more resistance.

Here's how it works:

  • Let's say you have a population of harmful bacteria causing problems – some of these are naturally resistant to antibiotics.
  • Antibiotics kill both the good and bad bacteria in your body, but the naturally antibiotic-resistant bacteria stand strong.
  • Without all the antibiotic-susceptible bacteria taking up space, the resistant bacteria have room to multiply and they pass their resistance on to other bacteria.
  • These "super bugs" no longer respond to certain antibiotics, leading to longer, more intense, and sometimes untreatable infections.

How Antibiotic Resistance Happens

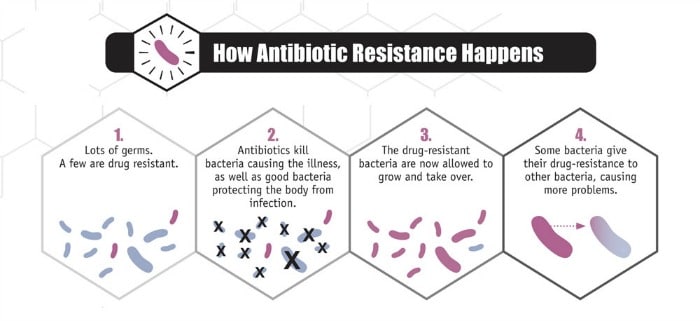
Source: Centers for Disease Control and Prevention

Every time we take antibiotics, more resistant bacteria have the opportunity to flourish – and some even become resistant to several different antibiotics, turning them into dangerous pathogens.

This is where taking probiotics with antibiotics can make a critical difference in your health.

What Are Probiotics?

Garden of Life ProbioticsThe Greek word probiotic means "for life," a fitting description considering that probiotics are bacteria that have beneficial, life-supporting effects in your body.

From regulating your immune system and supporting your digestion and metabolism to crowding out pathogenic bacteria, balancing your blood sugar, and moderating your moods, the good bacteria in your gut positively impact your health in countless ways.

Probiotics work by crowding out or killing bad bacteria, producing enzymes and vitamins, communicating with your body's cells, manufacturing brain chemicals like serotonin, sending signals to your brain, and regulating a large number of bodily processes.

We have more than 100 trillion bacteria in and on our body. All of these teeming colonies of microbes, both good and bad, make up a unique ecosystem called the microbiome.

Effect of Antibiotics on Your Microbiome

Even if antibiotics are prescribed responsibly – and by responsibly, I mean for serious bacterial infections, not viruses – they are associated with some significant negative health effects.

You see, in a balanced microbiome, probiotics comprise 85 percent of all the bacteria; that leaves only 15 percent of the bad guys. With beneficial bacteria solidly in the majority, your probiotics can work hard to keep you healthy and harmful bacteria are unable to gain a foothold.

Good Bacteria vs Bad Bacteria

But, what if antibiotics knock that probiotic percentage down to 50 percent, 40 percent, or even 20 percent?

Think of your gut as a parking lot full of spaces for bacteria to "park" and make a home. If the spots are full with mostly good microbes and a bad guy gets in, he has nowhere to park and must leave.

Antibiotics clear out the parking spaces, getting rid of most of the pathogens but wiping out the good guys, too. Now, what if a bad guy gets in? You guessed it – with plenty of open parking places, he (and all his friends) can settle in and take over.

Side Effects of Antibiotics

This sudden proliferation of bad bacteria and accompanying loss of the health-promoting good guys lead to a variety of antibiotic side effects, such as diarrhea, fungal and yeast infections, and inflammation – all of which can open the door to a wide variety of serious health issues.

That's because by weakening your body's probiotic makeup, antibiotic use also weakens your immune defenses.

A staggering 80 percent of your immune system resides in your gut where your probiotic bacteria work to regulate nearly every aspect of your immune function.

This also explains why it's common for antibiotic use to lead to recurrent infections (and, of course, subsequent antibiotics), and why many people find themselves in a downward spiral of sickness, a vicious cycle that's hard to break.

One side effect of repeated antibiotic administration is a Clostridium difficile infection. C. difficile is an opportunistic pathogen that thrives in the carbohydrate-rich environment of a gut cleared of its good microbes (2).

C. difficile (commonly called C-diff) is a potentially fatal microbe that secretes toxins that lead to diarrhea, fever, and colon inflammation.

Even though Fleming himself warned us of the dangers of antibiotic overuse, we're only recently connecting these dots and beginning to make changes to both our paradigm and our habits – and the reason is twofold.

The Microbiome Matters

First, we've discovered the world under the microscope – our bacterial cells outnumber our human cells by a factor of 10:1.

We now understand the role our microbial health plays in our overall health and that a damaged microbiome can lead to a host of ailments such as poor immune function, mental disorders, obesity, and even chronic disease.

Second, we're beginning to experience the realities of resistant bacteria firsthand.

The bad news is that just one course of antibiotics can negatively alter your gut microbiome and affect your odds of feeling your best.

In one recent study, researchers analyzed 66 individuals for 12 months after taking a course of antibiotics and found that the medication devastated the gut microbiome for up to a year.

Most apparent was the decline in short chain fatty acid-producing probiotics, which are important for controlling inflammation in the body. (3)

Taking Probiotics with Antibiotics Can Help

Although it may sound counterintuitive to take probiotic supplements while also taking probiotic-killing antibiotics, research shows that it's beneficial to your gut health to fortify your system with the protective good guys.

In one recent review, patients taking probiotics during a course of antibiotics saw a whopping 60 percent reduction in the risk of contracting a C. difficile infection (4).

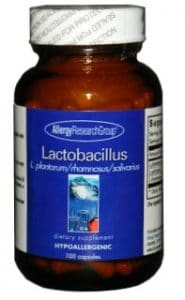
In another study, adults and children who took the probiotic Lactobacillus rhamnosus during antibiotic treatment had a 10 percent less risk of contracting antibiotic-associated diarrhea (5).

Even in people who do experience diarrhea when taking broad-spectrum antibiotics, probiotic supplementation reduces the duration of symptoms by an entire day (6).

Probiotics may also help prevent widespread antibiotic resistance by ensuring that people take their full course of prescribed antibiotics.

Stopping a course of antibiotics early – usually because of intolerable side effects – increases the chances that some of the bad bacteria may survive and become resistant. By reducing or eliminating side effects, probiotics can make it much easier to stay the course (7).

Not too shabby for a bunch of microscopic friendly flora!

5 Tips for Taking Probiotics with Antibiotics

We know that taking probiotics with antibiotics can prevent and alleviate side effects, repopulate the gut microbiome, and minimize antibiotic resistance, but how do we mix probiotics and antibiotics without having them cancel each other out?

First and foremost, make sure your doctor has confirmed a bacterial infection that warrants an antibiotic intervention before rushing to fill your prescription.

If not, request a lab test to make sure – you'd hate to take a harsh, gut-damaging antibiotic for a viral infection that will clear up on its own.

If you and your doctor have decided that antibiotics are a necessity, including probiotics in your daily wellness routine will maximize your chances of staying healthy.

Here are our five tips for correctly taking probiotics with antibiotics:

1. Find a Multi-Strain Probiotic Formula

Bottle of probiotics

Taking a daily probiotic supplement is a smart idea even when you aren't fighting an infection, but it's especially important during and after a course of antibiotics.

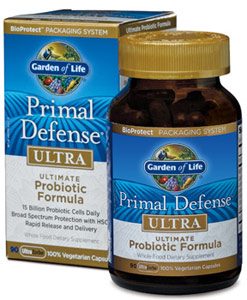
Look for a high-quality formula with a variety of human-resident strains (those from the Lactobacillus, Bifidobacterium and Streptococcus families) to repopulate your gut, including strains like L. rhamnoses proven to help during antibiotic treatment.

Also, choose a formula that guarantees the live bacteria will survive the acid-filled journey into your gut – many probiotic products in standard veggie capsules only have a 4 percent survival rate.

2. Give the Antibiotics Some Space

Wait at least two hours after taking antibiotics before taking probiotics.

As antibiotics work their way through your system, they'll try to destroy anything in their path, including your good bacteria. Waiting two hours gives the antibiotics time to pass through your body so the good guys can safely settle in.

3. Don't Stop!

Even after you've finished taking your course of antibiotics, you have some rebuilding to do – remember, it can take an entire year for your gut to recover from the nuking effects of antibiotics.

To rebuild and repopulate, continue taking a high-quality probiotic supplement as long as you are able, preferably indefinitely.

4. Incorporate Other Probiotic Sources

During and after antibiotic treatment, your best bet is to get as many different strains of probiotics into your system as possible to keep out the bad guys.

Kimchi in a jar

[Related: 17 Recipes Full of Probiotic-Rich Foods You Need to Start Making]

A probiotic supplement should be your number one priority, but you can also indulge in yummy food-based probiotic sources to give your system a boost. Fermented foods and drinks including ultimate superfoods like kimchi, sauerkraut, kefir, and kombucha all pack a big probiotic punch.

5. Focus on Prebiotics

The good guys in your gut need to eat in order to stand up to the bad bacteria bullies.

Luckily, their favorite food source – prebiotic fiber – is in several common foods that are easy to incorporate into a healthy, whole-foods diet.

Bananas, apples, onions, garlic, Jerusalem artichoke, asparagus, and dandelion greens to help your good microbes thrive.

And remember, the more you focus on whole, plant-based foods, the better. Studies show that this type of diet can have a relatively quick effect on your gut microorganisms (in as little as 24 hours).

Probiotics Instead of Antibiotics?

As the field of microbial research continues to expand, we expect the future of medicine will include targeted probiotic prescriptions in lieu of antibiotics, and that antibiotics will be reserved for specific or emergency scenarios.

In fact, probiotics are already proving to be more effective than antibiotics at treating and preventing certain diseases and infections, such as mastitis.

In one study, researchers analyzed 352 women suffering from mastitis, a painful breast infection often associated with breastfeeding. After 21 days, women who took probiotics saw more improvement and fewer recurrences than those taking antibiotics (8).

Keep Your Gut Healthy

In the meantime, the best thing you can do to ensure long-term optimal health is focus on tending to your microbial garden by protecting and nourishing your good flora.

And, don't forget to look out for antibiotics in your food! Farmers often use antimicrobial medications to fatten up their livestock, so if you eat meat, fish, or dairy, make sure it's antibiotic-free.

It's hard to fathom where we'd be without the life-saving power of antibiotics.

But, as we move forward responsibly – using antibiotics only when absolutely necessary and making sure to support our wondrous gut microbiome along the way – we can do so with confidence that we're giving our entire body the fortification it needs to live a healthy and vibrant life.

Enjoy This Article?

Intermittent Fasting Beer

Source: https://yurielkaim.com/probiotics-with-antibiotics/

Share:

Sabtu, 11 Desember 2021

Android Intermittent Fasting App

Android Intermittent Fasting App

There might be affiliate links on this page, which means we get a small commission of anything you buy. As an Amazon Associate we earn from qualifying purchases. Please do your own research before making any online purchase.

Wondering what intermittent fasting app delivers the best results?

Considering that intermittent fasting has taken the health and fitness world by storm, perhaps you're grown curious about it and want to try it out.

But with so much information floating around about the trend, you may not know where to start. You might also be confused about terms like fasting windows, 16/8, or the 5:2.

Maybe you wish there were an easier way to get on with this method of healthful living.

Today, we feature seven of the best apps that can help ease you into intermittent fasting, track your fasting periods, and monitor your weight-loss goals. We hope that the information we share helps you make an informed decision when it comes to choosing the app that's right for your needs.

Before we introduce the apps, let's briefly discuss the benefits of fasting.

What You Will Learn

  • The Benefits of Intermittent Fasting
  • The Best Intermittent Fasting Apps
    • 1. Zero Fasting Tracker
    • 2. BodyFast
    • 3. Fastient
    • 4. FastHabit
    • 5. Fasten
    • 6. Window
    • 7. Vora
  • Final Words

The Benefits of Intermittent Fasting

Intermittent fasting refers to the cycle of eating and fasting. It is not a type of diet, but a pattern of taking in and withholding food.

Fasting has actually been around for thousands of years. It has been done for religious, medical, and other purposes.

Furthermore, it's not only humans who are known to go on fasts. Animals instinctively undergo fasting when they are sick.

Research has shown that fasting resets the body's immune system, helping us regain strength and vitality.

Intermittent fasting's other benefits include:

  • Weight loss
  • Increased metabolism and fat-burning ability of the body
  • Improved focus and mental clarity
  • May reduce inflammation
  • Promotes longevity

The following intermittent fasting apps can help you achieve your health goals. These apps were chosen for their range of features, ease of use, and the general positive experience of users.

The Best Intermittent Fasting Apps

1. Zero Fasting Tracker

app zero intermittent fasting | apps for intermittent fasting free | best free intermittent fasting app for weight loss

Zero was created in 2016 by one of the founders of Internet news aggregator Digg. Users love this tracker because it's super easy to use.

Right from the beginning you get to choose the type of fast you want to do. Some of the options include:

  • Circadian Rhythm – fasting from sunset to sunrise, which is close to the feeding/fasting times of our natural body clocks.
  • 16:8 Intermittent – 16 hours of fasting and 8 hours of feeding window, as popularized by Dwayne Johnson and Hugh Jackman. This involves skipping either breakfast or dinner, depending on your preference.
  • 18:6 Intermittent – This involves fasting for 18 hours, with a 6-hour window for meals. This type of cycle is ideal for experienced intermittent fasters.
  • 20:4 Intermittent – If you have been doing intermittent fasts for some time, you might want to try this cycle, with 20 hours of fasting and a 4-hour eating window. This could mean eating just one meal per day, or a couple of small meals within the 4-hour period.

The app also allows you to track customized intermittent fasting cycles.

It also indicates the time remaining until your eating window opens up, and shows you how many other users are fast at that same time. Furthermore, the app provides the time you started your fasting cycle and when it ends.

Other features include notes and a history tab that contains the logged summary of your fasts. Here, you can view the stats of your previous fasts. With this feature, you can also check out your longest fast cycle.

There is also a learn tab that provides access to useful resources such as articles and videos related to intermittent fasting and health.

This is the ideal app for keeping track of your progress while doing your fasts. It is a straightforward tracker that delivers all the necessary information you need.

The app is free on both iOS and Android.

2. BodyFast

best intermittent fasting app apple watch | best intermittent fasting app ios | best intermittent fasting app iphone

BodyFast was developed in 2019 by Matthew Hammer, founder of Germany-based publishing software company Open Publishing.

The free version has no advertisements, unlike most free apps. It provides more than 10 different fasting cycle options. There is a timer for your fasting and eating periods, as well as a weight and body measurement tracker. BodyFast syncs with Apple Health.

The app's premium service provides a personalized experience when tracking your fasting cycles. The coach feature provides an individualized fitness program, with meal planning and other health advice based on your age, health, and fitness goals. (Head over to this post to check out the best meal planning apps and websites.)

In addition, with the paid subscription, you can manually choose from over 50 fasting methods. Subscription rates are $29.49 for three months; $49.99 for six months; and $58.99 for one year. The app is ideal for those who want a meal-planning feature with their intermittent fasting tracker.

3. Fastient

do intermittent fasting app | does fasting cause appendicitis | free fasting app no subscription

This app from Ross Ball's STCCR Web Design is a user-friendly intermittent fasting app with a journaling feature for you to record your thoughts, ideas, and experiences during your fasts.

The app allows you to track your progress through a visually pleasing progress bar. Its home screen is clutter-free, ensuring that you get to see your most current stats unimpeded.

You can customize your fasting plan, edit the start time of a fast, and add an end goal to a fast cycle. The app also allows you to cancel a fasting cycle without adding the data to your existing stats.

Fastient accommodates fasting cycles such as 16:8, alternate day fast, one meal a day, and more.

The standout feature of Fastient is its journal. Through the journal, you can keep track of your food intake, symptoms you experience during fasting periods, cravings, etc.

The app can be downloaded for free. To access the premium features, rates are at $4.99 for the annual subscription and $11.99 for the lifetime subscription.

4. FastHabit

free intermittent fasting app for iphone |  | intermittent fasting | intermittent fasting and apps

The FastHabit app from whitespectre allows you to dive into intermittent fasting in the smoothest way possible.

This app allows you to set your fast cycles according to your preference. You can adjust these settings anytime. FastHabit has an Apple Watch integration, making it easier to track your fasts even if you don't have your phone with you.

To further motivate you to achieve your health goals, the app provides a visual summary of your "streaks," showing you the number of days you've stayed on track of your fasting cycle. If you're aiming for weight loss, you can also track your progress through this app, which shows the daily results overlaid with the fasting periods.

This app is ideal for those who are ready to fully commit to the intermittent fasting lifestyle. The app is free, with an option to upgrade to pro for $2.99.

5. Fasten

best intermittent fasting app review | best intermittent fasting tracking app | bodyfast intermittent fasting app

This app is part of Welzen's collection of apps that promote wellness and health, which also features a meditation app and an app for tracking water intake.

The app is fast becoming a crowd favorite due to its unique features. It allows you to track your fasts using eight preset options, and you can also use it to track an entire week's fasting cycles. Aside from the preset options, you can also customize it according to your preferred intermittent fasting cycle.

Fasten's other features include:

  • Weight tracker
  • Hydration tracker
  • Mood tracker
  • Integrated with Google Fit

This app is perfect for those who are on a keto diet and considering complementing it with intermittent fasting. Through this app, you can access over 200 low-carb recipe suggestions. What's great about this feature is that you can only access the recipes during your eating window periods. This lessens the temptation to backslide on your weight-loss goals.

You can download the app for free. A premium version is available with an annual subscription rate that starts at $29.99.

6. Window

intermittent fasting and calorie counting app | which app is best for intermittent fasting | which intermittent fasting app is best

This app from DailyBurn promises to help you achieve better eating habits and a healthier life. You can choose different fasting plans on its eye-catching interface.

The main features in the free version of this app include:

  • Fasting cycle tracker – allows you to schedule your eating windows and fasting periods in advance
  • Notifications when your eating window is opening or closing
  • Tracking your water fast
  • Use any device to open or close your eating window (via Siri)
  • Data syncing (via the Apple Health app)

With the premium feature, you have the option to choose from eight of the most popular intermittent fasting plans. Moreover, you can attach photos and create notes to document your experience while doing intermittent fasting.

This app works great for those who need an intermittent fasting tracker that provides a documentation feature so they can view their progress while fasting. Subscription rates for the premium version of this app start at $19.99 for three months and $49.99 for one year.

7. Vora

which is the best intermittent fasting app | window intermittent fasting app cost | zero app for intermittent fasting

Vora was created by OliveX (HK) Limited, and is a pretty standard tracker for intermittent fasting when you considering appearances alone. However, it has a standout feature that earns it a space in this post.

Some people need the support of others in order to meet their weight-loss goals. The developers of this app provide for that need by incorporating a community support feature.

As an intermittent fasting tracker, it provides a timer for starting and stopping a fasting/eating window. It also has a visual log of your "streaks" for the last seven days.

However, the main draw, as we mentioned, is the community support feature. By going into your "Feed" tab, you'll find a list of people who are fasting and the number of hours they've accomplished. People can "heart" these accomplishments, giving the fasters a boost in their motivation and accountability for staying on track while doing intermittent fasting.

Vora is a free app. However, there is also a pro version at $4.99.

Final Words

Out of all the apps featured today, Zero is the best overall for the ease of use of its interface and the features aiding users while they're doing intermittent fasts. More importantly, these features are accessible and available for free.

Depending on your needs, there is surely an intermittent fasting app that's right for you. We hope that this post will help you make an informed decision as to which app works best for your situation.

In closing, the information, tips, and suggestions provided by the apps are guides on how to achieve better health. However, these should not replace the advice and recommendations given by professional health care experts.

Stay healthy!

intermittent fasting app | app for intermittent fasting free | best intermittent fasting app

7 Best Intermittent Fasting Apps (Our 2021 List)

Android Intermittent Fasting App

Source: https://www.developgoodhabits.com/intermittent-fasting-app/

Share:

Sabtu, 04 Desember 2021

tarpaulin 4x3 free mockup

tarpaulin 4x3 free mockup

Designing a vinyl banner is easy; however, designing an effective vinyl banner may be easily overlooked .  Many times, your vinyl banner company offers to provide design services, or they may allow you to submit your own artwork.  In this article, let's discuss how exactly to properly lay out not only a visually appealing vinyl banner, but to design a banner effectively that will accomplish your goal!

First, it's important to ask "What's the purpose of my banner?"  Is it a "decorative banner" (maybe for a one-day birthday or party where its function is simply to add to the ambiance of the occasion?), or is your banner going to serve as a community announcement for a grand opening or sales event that will be expected to capture attention and results?

Second, how long will your banner "be in service?" Maybe the announcement banner will be hung for 30 to 60 days near a busy intersection whereas the birthday banner may only be hung indoors for three or four hours. Or, maybe you're going to "stretch" the life of your banner to several months or even for as long as the banner will last (many of our clients display banners on their buildings for years!)

Even though banners are considered "temporary signage," we've had clients that have posted our banners for several years before fading or tearing.  Your climate plays a huge role in determining how long a banner will last (rain, wind, etc), and the type of materials and inks your banner is produced plays another major part.  For example, solvent inks printed on 13oz or heavier vinyl material normally last longer than water based inks printed on lighter weight vinyl materials. If you have a banner supplier who offers "overlaminate" as an option to your banner, you may expect (in normal weather conditions) for your banner to last 50% to 100% longer. If you're planning to purchase a banner that will "live" near water- rainy areas or especially coastlines, please consider asking your banner provider if overlaminate is an option. Water (rain or sea spray) can damage banners really quickly! (Even faster than wind!)

So let's take a look at common vinyl banner sizes .

Banner Sizes and Templates

Banners come in, literally, almost all sizes and shapes, from 1 foot by 1 foot, to those HUGE banners you see draping down from the casinos and sky scrapers in Vegas and "big cities."

Some of our most popular banner sizes include: (click here to download banner size templates)
1' x 3', 1' x 4', 1' x 5', 1' x 6', 1' x 8' (great for pop up tents)
2' x 2', 2'x 4', 2'x 6', 2'x 8', 2'x10', 2'x 12' 2' x 20' (great for parties)
3' x 3', 3' x 4', 3' x 6', 3' x 8', 3' x 10', 3' x 12', 3' x 20' (good for high-traffic purposes)
4' x 4', 4' x 6', 4' x 8', 4' x 10', 4' x 12' 4' x 15', 4' x 20' (GREAT for high-traffic purposes)
5' x 5', 5' x 8'   6' x 6', 6' x 8' 8'x 8', 8' x 10', 8' x 12', 8' x 16' (good for back-drops)
10' x 8', 10' x 10', 10' x 15', and 10' x 20' (GREAT for HUGE high-traffic, such as highways or draping over large structures, or for backgrounds such as concerts, trade shows, etc.)

You can scroll down further to see an illustration of sizes or to download our most common banner templates (click here.)

Since banners come in all sizes, choosing the correct size is very important not only to accomplish your results, but also to save you money.  Our most frequently ordered sizes are: 2 feet tall by 6 feet wide, 3 feet tall by 6 feet wide, and 4 feet tall by 8 feet wide.  We print hundreds of banners in every size in between, and we also produce back-drop and over-sized banners that range from 8 feet tall to 10 feet wide and even larger.

In general, the size of the viewing area will determine the size for your banner.  For indoor parties, a 2 x 6 banner may work perfectly if you're in a smaller or medium size room.  But if you're having a party at a convention center, than you will need a 4 x 8 or even larger banner so that the banner will be seen easily by a majority of the people. Or if you're announcing a grand opening or business event that will be hung outdoors near a busy intersection, a 2 x 6 banner may be a complete waste of money (too small to be effective) and you may need a 3 x 6 or 4 x 8 size banner. If you're confused about which size banner to use, simply call us at 866-267-5814 or press live chat and we'll be happy to help.

Banner Features

There are several common features to most banners.  First is the weight of the vinyl used for the banner.  Many common sizes include 10 oz, 13 oz and even heavier.  In general, 13 oz is  the most common vinyl weight and works in most uses. You can safely use a less expensive lighter weight banner if  your use is very temporary (indoor party,) but make sure you use a heavier weight banner for outdoor banners that will be displayed in windy areas or longer than 2 weeks.

Second, does your banner need to be seamed or sewn for extra durability? Seaming a banner entails that the perimeter of the vinyl being "folded over" and affixed with durable double-sided seam tape. Most banner companies offer seaming as a normal feature; however, you may not need this added benefit, so why not save money?  For example, if you're using your banner for an indoor birthday party, it's highly unlikely your banner needs to be seamed unless it's being hung or displayed in a fashion that will cause a lot of tension on the vinyl (such as with ropes or bungee cords)

Third, does your banner require grommets? Grommets are the circular metal rings stamped onto the perimeter of a banner.  If your banner is going to be hung with rope or bungee cords, it most certainly will require grommets to provide the means to attach the banner to the chords.  However, if your banner is going to be displayed on a board or wall for a short amount of time, you may be able to use tape or staples to affix your banner to the surface, thus saving the unnecessary expense of having your banner company provide grommets as a finish!

Fourth, does your banner need to be sewn (for the seaming process) or will double sided seam tape work?  In general, if your use is for pole banners or banners that will be hung for a long time, you may require sewn seams vs. seam tape. But if you're using a banner for a temporary use, seam tape works fine. Seam tape also normally works fine in "normal" weather conditions.

Here's a pictures of a "sewn seam" on a vinyl banner:

And here's a picture of several grommets prior to being affixed to a vinyl banner:
And finally- here's a grommet after being affixed onto a vinyl banner:

Seaming with strong and reliable application tape works in most environments and can often save you money!

Designing Your Banner

Many people truly enjoy designing or laying out their banner.  It can be a fun and creative process. However, in designing your banner, make sure you keep in mind the overall goal of your banner.  If your banner is being used as a decoration at a birthday party, then your goal may be to create the banner to look artistically incredible and designed to highlight or promote the person being celebrated.  Fonts, pictures, shadows, effects, and colors that pop may be your first consideration.  However, if your banner's goal is to convey a message at a busy intersection, than the message itself is the most important item to consider.

If your banner's goal is the first mentioned above, than there may be few rules to follow.  Let your imagination run wild! But if your banner's goal is the second above, here are a few ideas to consider:

1) Go with easily readable fonts.   We recommend sans serif fonts (arial is our default) for conveying information such as: SALE!  or GRAND OPENING or for phone numbers, domains, addresses, etc.  Don't get fancy here.  If your viewer is in a car passing by at a high speed, the last thing you want is for them to not be able to read the message because of the font.

2) Use highly contrasting colors.   We recommend as our top choices: red on white and black on yellow.  Black on white also works well.  But stay away from the difficult to read combinations such as red on black, purple on black, or any closely related colors.  Lighter colors such as pink and yellow will fade away on a white background.  As a rule of thumb, if you print your banner proof on 8.5" x 11" paper, and can't read it easily from @ 5-10 feet
away, than you'll more than likely have trouble with your banner.

3) Keep out the clutter .  Whether using your banner for a party or for a business celebration, avoid placing small clutter text that won't be viewed. In fact, if your banner is being used at an intersection as a billboard, you may want to keep the text to a bare minimum: just the message and relevant contact information.

4) Use quality images/files.   Remember that your banner will be printed using a wide format printer.  Small images and pictures often pixelate when enlarged.  As a rule of thumb, if your picture file is under 2 mb, you run the risk that your picture will be blurry when printed (excluding vector images).

5) Save your file correctly for your banner company.   Regardless of the type of design program you're using, make sure you size your file correctly and save it in the appropriate format.  Common formats include vector, pdf, jpeg, and tiff. Sizing depends on the quality of your file as well as the means to send the file to your banner company.  Files larger than 10 mb are difficult to email and require an ftp upload or physical delivery via a disk or memory stick.

Keep in mind that normally your banner will be truncated approximately 1 inch around the perimeter for the seaming and grommeting, so make sure you design your banner with at least a 1 inch bleed.  Below are several templates (pdf files) for you to use in designing
your banner which most banner or printing companies should accept for your design.

Click here to download many of our most common vinyl banner templates (pdfs):

Here's a "scale chart" how banners look next to an average, professional "banner model." (Results may vary...).

Horizontal Vinyl Banner Size Chart

Vertical Vinyl Banner Size Chart

3 Foot Horizontal Banner Size Chart

3 Foot Vertical Banner Size Chart

4 Foot Horizontal Banner Size Chart

4 foot Vertical Banner Size Chart

Backdrop Banner Size Chart

Check out our LGB Marketing Tips & Articles Here

tarpaulin 4x3 free mockup

Source: https://shopletsgobanners.com/pages/how-to-design-a-banner

Share:

Jumat, 03 Desember 2021

poster mockup free 2019

poster mockup free 2019

Get better reviews for your mockups in 7 steps

Comp (aka mockup) reviews are a vital step in the design process, but they don't have to be so stressful.

Image courtesy of AJC, https://www.flickr.com/photos/ajc1

Image courtesy of AJC, https://www.flickr.com/photos/ajc1

Here we've compiled a practical list of best practices to follow before your next mockup review. You might be surprised by some of the simple tips that go a long ways towards setting yourself up for success.

Definitions

Before we dive into the tips, let's first agree on our definitions.

First, the term "mockup" refers to the visual representation of the final project, the deliverable that showcases what the completed site should look like. You might also know these by the term "comps."

Mockups are not wireframes. Wireframes are a completely different (and earlier) iteration, the barebones outline of a site to determine content placement on the page (and sometimes overall information architecture).

Wireframes and mockups aren't even the same fidelity – wireframes are very basic, little more than lines and some boxes, while mockups are the opposite, often (but not always) containing the graphical fine points.

Image courtesy of www.uxpin.com

Image courtesy of www.uxpin.com

Second, mockups aren't fixed at any one place in the design process. In rapid prototyping, they're most common near the end of the process, after several wireframing and low-fidelity prototypes give you some preliminary feedback to step off from.

But one could just as easily jump straight into a mockup at the beginning and move directly into coding an interactive prototype. Everyone's design process is different, and there's no right or wrong way.

Wherever mockups fit into your process, when it comes time for the review, you'll get the best results if you follow these six steps below.

01. Check your design against user data and personas

Make no mistake about it: you'll always encounter criticism during mockup reviews. That's not necessarily a bad thing, either; the whole point of the review process is to create a better product from fresh perspectives. The problem with criticism arises only when it's unwarranted.

You'll be in a much better position to defend your decisions (and guide others for their feedback) if you can back up your choices with actual data.

Personas exist for this reason, as a stand-in for your users, only as effective as the data they're built from. If you made your design decisions based on your persona data – and can prove it in a review meeting – you'll be on better ground to separate the valid critiques from personal opinion.

Image courtesy of www.uxpin.com

Image courtesy of www.uxpin.com

When presenting your mockup, discuss everything as it relates to user goals . This will keep the focus of the meeting where it belongs, and will even preempt some misguided comments.

Yes, your opinion as a designer is valuable since users aren't conscious of the intangibles influencing their experience (the ones that you deal with on a daily basis). But your knowledge, skill, and expertise are only sharpening the knife put forth by your users. Make sure you've designed for the right reasons before ever revealing your work to the outside world, otherwise you'll deserve whatever shredding you get.

If you're having trouble stepping away from your own ego, try asking yourself questions like:

  • Would our target users find this interface intuitive? What difficulties or confusion might they run into?
  • Does the learning curve match the context of use?
  • How does the interface make the person feel? (For example, does the form completion process feel like a machine asking for data, or another human conversationally guiding you to better help yourself? The subtle details of microinteractions add up fast, so don't take anything on the page for granted.)
  • Is the user overwhelmed with choices? Remember the principles of Hick's Law (e.g. limiting on-screen choices) which we described in Interaction Design Best Practices.
  • Does the visual style match the appropriate mood for the users? What about the tone of the language?

A good mockup review session depends first and foremost on a good mockup design. If you're designed using the proper fundamentals, you'll be able to confidently defend your decisions.

02. Invite the right people

If the problem isn't your design, maybe it's your audience. Sometimes the wrong people can derail your mockup review, so take extra consideration when writing the guest list.

Image courtesy of Jean Baptiste Paris, www.flickr.com/photos/jeanbaptisteparis

Image courtesy of Jean Baptiste Paris, www.flickr.com/photos/jeanbaptisteparis

On the one hand, you don't want to invite too few people: some people might feel neglected, and equally risky is that you'll miss out valuable insight from a key player (which becomes more problematic when their advice comes up far later in the process).

On the other hand, you don't want to invite too many people: this leans too close to "design by committee" and may unleash some extraneous politics, not to mention be a waste of time for some people. It's a tricky balance to strike, but there are some helpful guidelines.

Start with your core players: invite at least one person from the following four groups:

  • Marketing – having a marketer present will ensure none of the more tactical aspects of the project slipped by during the "creative" design process.
  • Expert on the Subject – someone who has relevant expertise with the subject – for example, if you're designing a new employee portal for the company site, you might invite your own HR director.
  • Product Management – you want someone there looking after the initial product requirements
  • Developers – a developer will provide indispensable feedback on the logistics of turning the mockup fantasy into a reality.

After that, invite whomever is necessary for your specific project – and only who is necessary. For example, if your design is exceptionally complex, you may want to call in an additional developer. The key is to limit it to only those you need.

03. Use the right collaboration medium

You've got a solid design backed by research, and now a confirmed guest list. The next step is getting everyone together.

Ideally, this is not their first introduction to your design ideas. The best practice is to share any wireframes or prototypes when they're relevant, so feedback specific to them can be implemented as soon as possible. In that case, everyone's been primed and has an idea of what to expect.

Mockup reviews are best done in-person; conference rooms with projection capabilities are a good choice. Talking face-to-face lets you hash everything else quickly, and streamlines any debates, explanations, discussions, brainstorming – the entire process, in general.

While best, getting everyone in the same place at the same time is not always an option. When scheduling conflicts arise, you can fall back on any number of collaboration platforms, depending on your needs.

Image courtesy of UXPin

Image courtesy of UXPin

Obviously, we're most familiar with our own tool, UXPin. This works well for mockup reviews because video/audio capabilities allow for real-time, personal discussions while everyone has access to the mockup (or wireframe/prototype) on the screen – anyone can add comments or make quick edits to the actual document.

The bare minimum, though, is any tool that allows you to communicate. For instance, after distributing the file, you could simply start a Google Hangout, or use a broad collaboration tool like Slack (very smooth and simple to use). The main goal of the mockup review is, after all, sharing thoughts with one another.

04. Always set the context

This is good advice for any review meeting, beyond mockups, even beyond the web design industry. The thinking is, "an ounce of prevention is worth a pound of cure".

Before the review, explain the context to set the stage. Cite the research the design was based on, and how your ideas aim to meet certain goals. As recommended in The Guide to Mockups, tell them the level of fidelity and why so they aren't expecting something beyond the current phase. Acknowledge any shortcomings or "TBD" elements now, so your audience can move past them and onto more helpful critiques.

Then, during the actual presentation of the mockup, explain your own mindset behind your choices. Sometimes designers can forget that everyone else doesn't know as much as they do, so any background you give will help present a clearer view of your vision.

Next page: establish ground rules and look ahead...

Current page: Page 1

Next Page Page 2

Related articles

poster mockup free 2019

Source: https://www.creativebloq.com/web-design/get-better-reviews-your-mockups-61515076

Share:

mobile app mockups tools for free reddit

mobile app mockups tools for free reddit

5 Top Tool Apps for Your iPhone

The growing number of tool apps on the market means that smartphone-equipped DIYers now have a diminishing number of excuses to use for putting off projects.

The number of tool apps on the market leaves smartphone-equipped DIYers with few excuses for putting off projects. Since the variety of digital tools may seem overwhelming, and of course not all tool apps are created equal, we've highlighted six selections for the iPhone that you should know about.

Bob Vila's Toolbox is your ultimate guide to the essentials of remodeling and repair. Specially designed and built for the iPad, Toolbox teaches you the fine art of choosing and using the right tool for the job. As you gear up to tackle your next project, wouldn't you feel more confident with Bob Vila at your side? DOWNLOAD

1. POWER TOOLS

Tool Apps - Power Tools

Photo: Power Tools

After Angry Birds, no other app is so obviously named. Power Tools is a concise explanation of six popular power tools: circular saw, jigsaw, miter saw, reciprocating saw and router. You learn the most likely uses for each one, common designs, and innovative new features. Power Tools is a basic tip sheet for consumers deciding on purchases and rentals. Interestingly, it includes recordings of what each tool sounds like. Good for identifying what your neighbor's using at 6 a.m.

2. sightLEVEL

Tool Apps - sightLEVEL

Photo: sightLEVEL

This tool app is billed as a virtual laser level, which might lead some to believe that it will actually produce a laser line on walls. That's not the case, of course. Apple hasn't put lasers in iPhones or iPads—yet. But sightLevel is perfectly serviceable and uses the phone's camera and accelerometer to determine angles and slopes. Choose different grids and guides for images shown on the screen, or use two fingers to find the slope of something within the image.

3. SIZEd

Tool Apps - SIZEd

Photo: SIZEd

This is a dead-simple tool app that might seem superfluous at first. What it does is join the two most important factors at play in purchasing materials for your home: dimensions and context. Use SIZEd to take a picture of, say, your living room. Then use your fingers to draw lines signifying the window dimensions (for drapes) or the big empty spot where you would like a couch. Standing in a home furnishing store, you can more accurately anticipate how a piece of furniture will fit, and blend with, the room.

4. FENCE BUILDER

Tool Apps - Fence Builder

Photo: Fence Builder

Here's another tool app. This one estimates the cost of building more than a dozen styles of fences. At its heart, Fence Builder is a robust materials calculator, telling you how much wood, concrete, and hardware you'll need. Want to surround South Dakota with a dog-eared cedar fence with one gate? You'll need 14 million planks, 780,000 posts, 1.6 million boards, 62 million nails, two hinges and one latch. Fence Builder estimates that it would cost $90 million to let South Dakotans have their privacy, but—and this is a big "but"—the app uses estimated average materials pricing. Your cost may vary, indeed.

5. CONSTRUCTION INSTRUCTION

This tool app seems custom-made for tablets. There are in-depth articles, vendor manuals, photos, schematics, animations and no-nonsense instructional videos. It's easy to imagine using Construction Instruction—a combination textbook, cheat sheet, and clipboard—not only to plan and build your own home, but also to examine a contractor's work on the fly. Overall, Construction Instruction is like walking through an in-progress building. You can see potential, but it's not ready for a certificate of occupancy. Where there is content, it's crunchy with useful, often technical info. But there are a lot of blank pages and obvious topical gaps. It's also too easy to lose track of where you are within the app. And most of the textual content is displayed on PDF pages, which are difficult to navigate on small screens. Download this one and hope for frequent updates.

For more on tool apps, consider:

3 Top Apps to Help You Plan a Remodel
5 Home Improvement Apps for Your iPad
The 5 Apps You Won't Want to Renovate Without

mobile app mockups tools for free reddit

Source: https://www.bobvila.com/articles/tool-apps/

Share:
 
banner